About
Notes about my main lockdown project, a self-guided crash course on digital tools for building 3D worlds.
Over a period of a few months, I was able to pick up some basic 3D workflows and build a simple scene inside a game engine. I looked into character design, 3D modelling, model rigging, animation, real-time 3D, game development, and more. I learned how to wield three deep, powerful, and freely available digital authoring tools: the graphics suite GIMP, the modelling tool Blender, and the real-time 3D development platform Unity.
This piece is primarily just an attempt to chronicle my journey, to put down on words even a fraction of the many, MANY lessons I learned along the way. At the same time, this is an attempt to articulate my thinking around digital tools more broadly, and to consider 3D as a creative medium.
The lockdown isolation gave this project a unique context, which I'm sure is reflected in what I produced. Further down, there's an undercurrent that links this exercise with my previous explorations. My island building is in part an attempt to gain another perspective on that Great Idea I'm trying to get closer to.
Introduction
3D is the quintessential medium of the 21st century, the infinite canvas behind the glass that separates us from the digital world.
The games we play, the virtual worlds we explore, are reflections of reality. The third dimension is a natural component of our world and the default way we perceive things — 2D requires more suspension of disbelief.
3D is already deeply enmeshed in everyday culture. Games are already a bigger business than cinema, and 3D brings modern games alive like never before. At the same time the chart topping movies today are computer generated fantasies and dystopias through and through, 3D worlds that feel more real than our own.
3D is in engineering, with big consulting houses building machines and bridges and cars. 3D is in hobbyist hands, in printers for parts to fix little broken things at home. 3D is deepfakes, and the doctored footage of a political rally. 3D is bigger than VR and AR, which may or may not amount to something. 3D is an extra dimension in simulations of complex systems, a homely environment for budding AIs, and all the virtual spaces where we could one day meet anyone and everyone.
There's never been a better time to learn to do 3D, and I'm not just talking about the unexpected time freed up by the lockdown. There is a wealth of amazing authoring tools available online for anyone to download and play around with for free. For flat graphics, GIMP rivals the best commercial programs. 3D authoring studio Blender has come a long way, and today is both more powerful and easier to approach than ever. Even the famously fragmented space of 3D game engines has somehow consolidated around a handful of mainstream systems, such as Unity and Unreal. These engines and environments bring versatile AAA capabilities to anyone willing to put in the hours to learn them.
I'm talking about a mature collection of digital maker tools, available to everyone with a (decent) computer. And each tool, of course, comes with a vibrant online community around it. This is the Internet that was promised.
There's countless videos and short clips out there, with professionals and beginners alike freely sharing their best work and their hard won tricks and tips. There are official and unofficial tutorials abound. Everything is available online, from tools and dodgy scripts to full asset libraries and models and textures and more. People are copying and pasting and remixing and cutting corners and hacking incompatible things together, because that's what you do with natively digital stuff. Even paid content seems to thrive in this ecosystem. Above all, though, it is a veritable community — with all the associated drama.
Together, these tools outline a space of possibility that is nothing short of the most versatile creative medium in the history of the world. 3D is a rich foundation to build on, a deep thinking tool for conceptualising and actualising ideas. Never before has it been possible, to such an extent, to realise dreams in high fidelity and depth. That said, just being able to make fully featured objects beyond the confines of physical reality is astounding.
For a long time, I've been meaning to scratch this particular itch of learning the skills to be able to construct my own digital world from scratch. The compulsory isolation of the lockdown provided the impetus to study a new skill, and with a Unity Learn offer to boot, I could not ignore the call any longer.
Years and years ago, I somehow picked up this idea, this vision or dream about an island, a comically small island in the middle of an ocean. At first, there was something there to be done, something to discover on the island. But as time went by, the idea of the island transformed from an adventure into something more like a reflection or a sentiment. To be alone on an island, to be an island — that is, etymologically, what it means to be isolated.
Could I make a simple game about island isolation? Create an entire island world from nothing?
Make no mistake: 3D is hard. And making a 3D game, no matter how simple, is HARD. Someone said it's like learning multiple foreign languages at the same time, which is a nice analogy. Learning one language helps with others, but there is still loads of learning to do. Figuring out all the peculiarities and idiosyncrasies of each one is serious work. There is certainly a language to 3D, there is a brutal grammar to programming; there is a poetry and a certain economy to visual effects, and there is a sophistication of clear expression in the iterative detailing of a mesh model.
It's good to have a target, even when just messing around trying to learn new skills, but there's definitely no need to overdo it. Diving in without much more than a vision for my island, just following my instincts and interests was invigorating — another feature of a great medium. Still, I could see the island in my mind, hear the waves against the rocks. The desire to get some kind of an island certainly got me through the trickiest parts of the project.
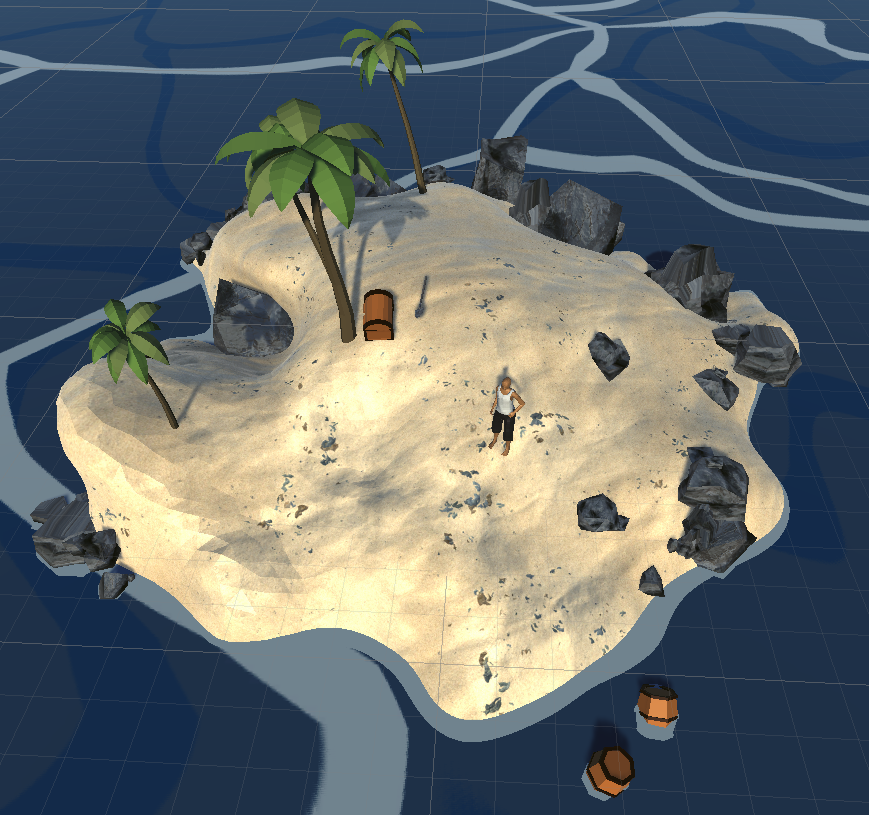
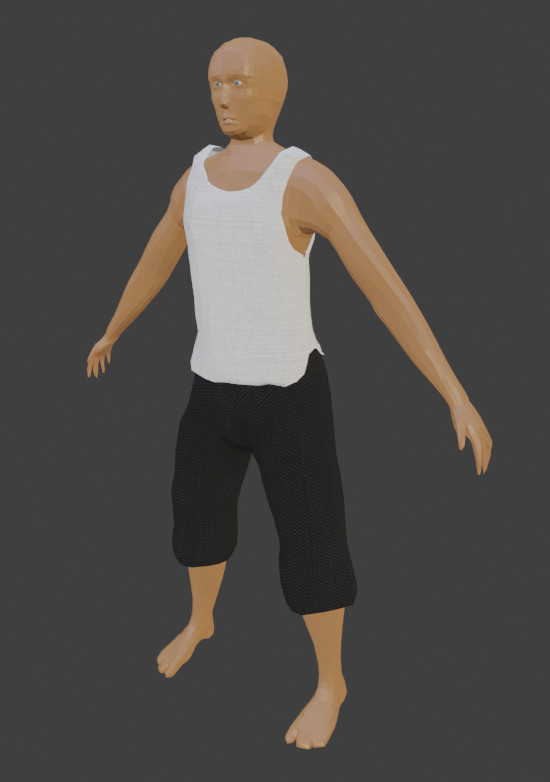
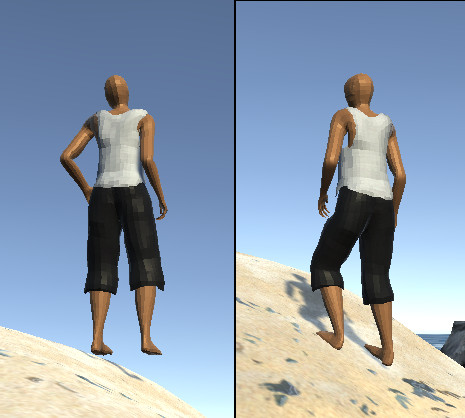
In the end, I managed to craft a simple character and to build a little island for him to roam. I was able to bring my scene alive just enough to appreciate the vastness of the space of possibilities that I was able to open up for myself, having learned the basics of all of these skills. But I did not take a step further. I had everything I set out to create: an island to walk on.
What follows is an account of my journey as I learned how to create a character and build a world, as well as some notes on what I learned in the process.
Background
Somehow the idea of a game set on an island entered my mind and got stuck. The game part is not really the point, it's more about the environment, the island as a setting for something. Isolation, being alone on the island, either as a castaway or a solo adventurer, felt right, felt like a natural fit. So I had to come up with an island and a character.
The Island
An island setting is a common thing, of course. There are countless stories about mysterious and special islands, from Atlantis to Themyscira to LOST. Often the island itself is the secret. The island creates the drama and the adventure.
But really, no mystery is needed, for an undeveloped island offers plenty of challenge and intrigue on its own by virtue of leaving the visitor exposed to the elements. Something about an escape to or from a remote island captures our imagination. This is manifest in, for example, the reality show phenomenon Survivor, as well as in narratives like Tom Hanks' iconic Castaway. There are countless stories of island explorers and prisoners and shipwreck survivors and millionaires and cultish gig-parties and hippies — all disconnected, willingly or not, from the rest of the world.
The film The Red Turtle really captured my imagination and crystallised my interest in the emotional side of an island existence. Olivier Vittel's film about Xavier Rosset's island adventure, 300 days alone... explores interesting psychological territory as well.
Islands have been explored to death in all kinds of games. There's everything from Monkey Island to Far Cry and from MYST to RiME. Fortnite is the island to be seen on, and you certainly don't have to be alone. On the other hand there's a whole island survival sub-genre, with games like Raft, Stranded Deep, Bermuda, maybe even Subnautica. In games like these you start with very little, build up a base, collect items and supplies, and explore your surroundings. Sometimes there is no definitive ending to the game — it's all about the journey.
Again, making a game wasn't really the point here, or at least I had no interest in sinking my time in trying to build a clone of any of the above. I just wanted a simple island, a standard issue island with palms and sand and a vast stretch of ocean in every direction.
For some reason, the island had to be small, and absurdly, cartoonishly so. Something almost out of a New Yorker cartoon, illustrating a point. An island to walk on. That was the main thing.
The Character
As we get older, the more the people we meet remind us of others we have met before. People are mashups of personality and character, composites of various traits we have learned to recognise. We grasp individual identities through stereotypes ("solid impressions") and subtle learned cues about social circumstances.
For this project, for whatever complicated reasons, I had three character concepts in mind, each one a peculiar blend of personalities:
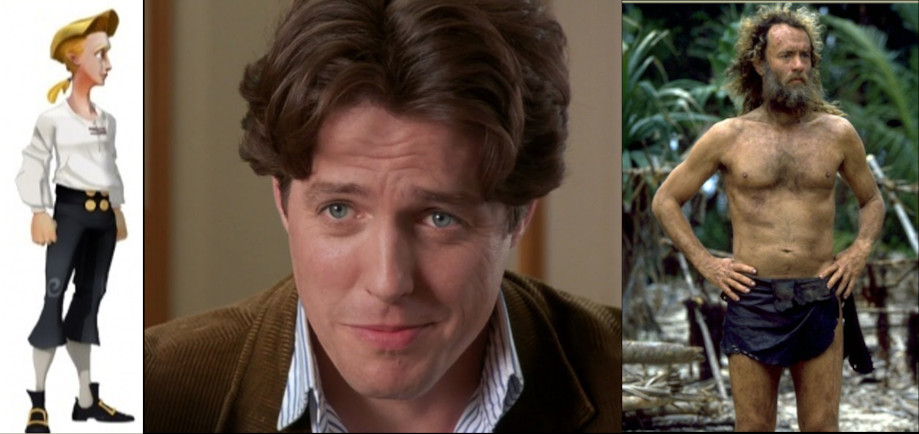
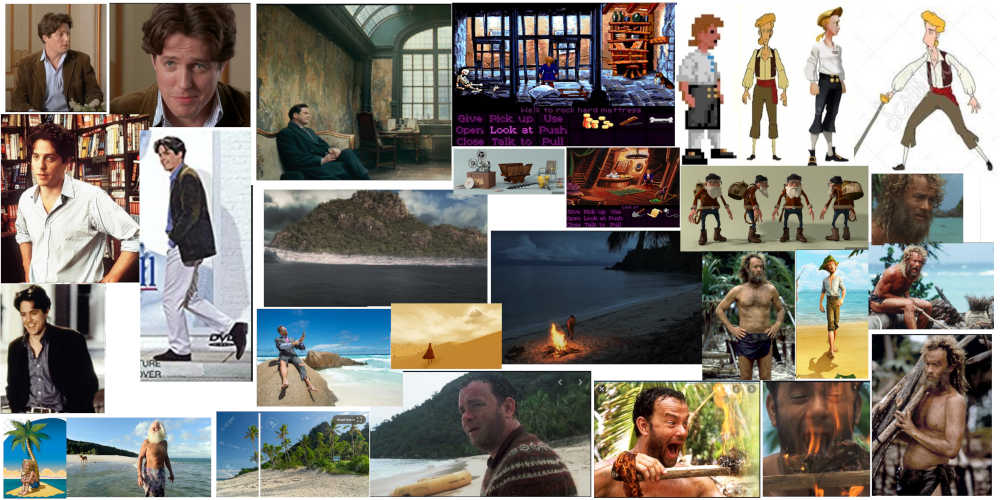
- Guybrush Threepwood meets Tom Hanks' castaway meets Hugh Grant's Englishman bookshop owner from Notting Hill.
- Barret from Final Fantasy VII (Remake) meets uncompromising computer repair shop operator Louis Rossmann of New York City.
- Maz Kanata of Star Wars canon meets the old ladies in Studio Ghibli stories
For the purpose of learning techniques, obviously just doing some character — any character — would work, but I also wanted to push forward on the creative side. I have feeling that it helped with maintaining momentum, working on my own mashup character concept. At the same time, not having a fully fleshed out character made the whole process a bit more difficult, as the only references were of my own shoddy making.
Somehow I could see how the first would work. The understated English humour of Grant's hopeless bloke, the loose-limbed upbeat pirate wannabe spirit of Threepwood, and the determination and aw-shucks presence of Hanks' resilient hero.
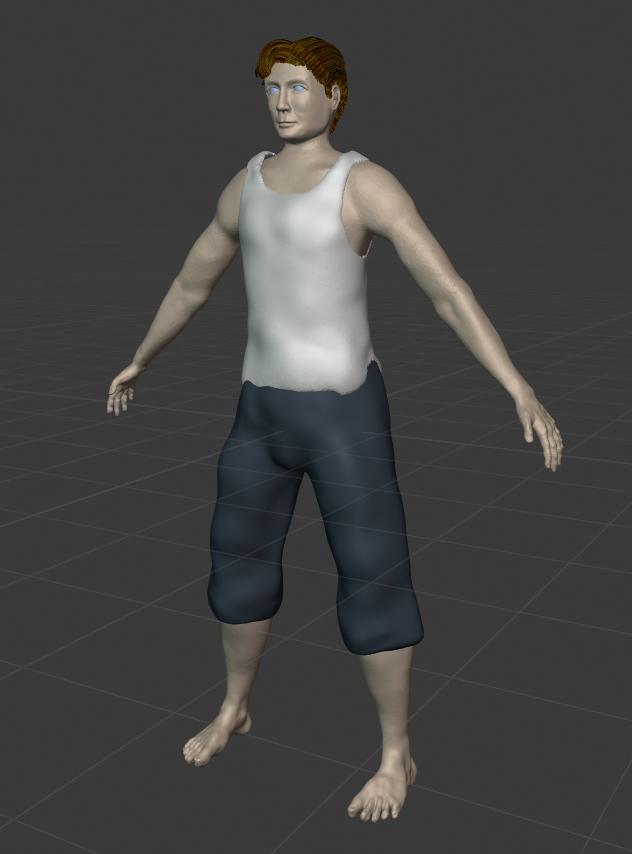
In the end it didn't really matter. I didn't have the ability to make much of a likeness on first try, so I just pushed on with a sketch. A minimum viable character.
I picked up the suitably generic Englishman name William from the Notting Hill namesake.
Crafting a Character
I first learned about the game engine Unity many years ago, mentally filing away the idea of one day giving it a proper look. In early 2020, right when the lockdown was put in place, I noticed somewhere online a mention that Unity was offering a free trial of their premium online learning resources, the Unity Learn library. There are various step-by-step guides in the library, not just for building things in Unity, but for the whole 3D model development pipeline. The premium video content, licensed from Pluralsight, shows how to go about building 3D assets using industry standard tools like ZBrush and Maya.
This project got started in earnest when I found the Unity Game Dev course series. I began with Beginner Art, and progressed through Intermediate Art all the way to Advanced Art. My journey was far from linear, and I kept jumping around and revisiting things and skipping ahead as I progressed.
As I mentioned, the tutorials follow a different toolset, first the sculpting tool ZBrush and later Substance Painter for texturing. I was following along, adapting the training to my own project and ideas, and in particular, carrying the concepts over to the tools I was working with. I believe this extra translation effort was extremely helpful in forcing me to process what I was learning. For each step along the way I could quickly find related instructions online, but many things I had to pick up by trial and error, with hours or days of frustration in between.
Another thing that I believe helped me was the fact that the premium content was originally scheduled to be available for free only until late June, so I had a hard deadline to aim at. This forced me to move on when I was getting stuck — frequently the thing I was stuck on I could understand better after skipping ahead a lesson or two. Again, learning things the hard way. The premium Unity Learn content is currently (2020-07) freely available through the Unity website.
Being rather fluent in C# and comfortable with all kinds of software systems, I wasn't too concerned about learning about Unity in the beginning. Accordingly, I focused on 3D modelling. If you are a total beginner, you might want to consider a different trajectory, starting with the Fundamentals series or the Beginning 3D Game Development course.
Sketching
Having settled on mashup-William as my target, I began the Game Character fundamentals course with a character study. As instructed, I compiled a character sheet and a visual reference.
WILLIAM
-
GENRE: Adventure, survival drama, meditative-reflective; big heart, simplified, understated comedy, quiet
-
ARCHETYPE/ROLE: Protagonist, sole human character; hero's journey from a weak person to a strong character
-
IDENTITY: Male Englishman
-
PERSONALITY: English; highly clever, but not overly smart; awkward and a little clumsy, yet resourceful and creative; well-read, well educated; charismatic, endearing; people person, more extroverted; eloquent, a poet, open with emotion and feeling; kind, big heart; justice and order; hapless, understated
-
GAMEPLAY/CLASS: NetHack Tourist; STR 11, INT 15, WIS 13, DEX 11, CON 14, CHA 17 ; weak, but slim and fit, sharp, reads well, charismatic, determined, wilful
-
HISTORY/BACK STORY: travel bookshop owner, probably public school, a little lost in his life; has routines, knows neighbourhood, has many friends; grew up in London; needs people in his life, even more so than the average person (Does he need to get back for some reason?)
-
SPECIFIC DETAILS, STORY ELEMENTS, INSPIRATIONS, etc.: see also Martin Freeman (adventuring like Arthur Dent or even Bilbo, lawful and morally upright Watson for Sherlock), Hugh Grant as heart-throb
"Many of Grant's films in the 1990s followed a similar plot that captured an optimistic bachelor experiencing a series of embarrassing incidents to find true love, often with an American woman. In earlier films, he was adept at plugging into the stereotype of a repressed Englishman for humorous effects, allowing him to gently satirise his characters as he summed them up and played against the type simultaneously." — Gary Arnold (source)
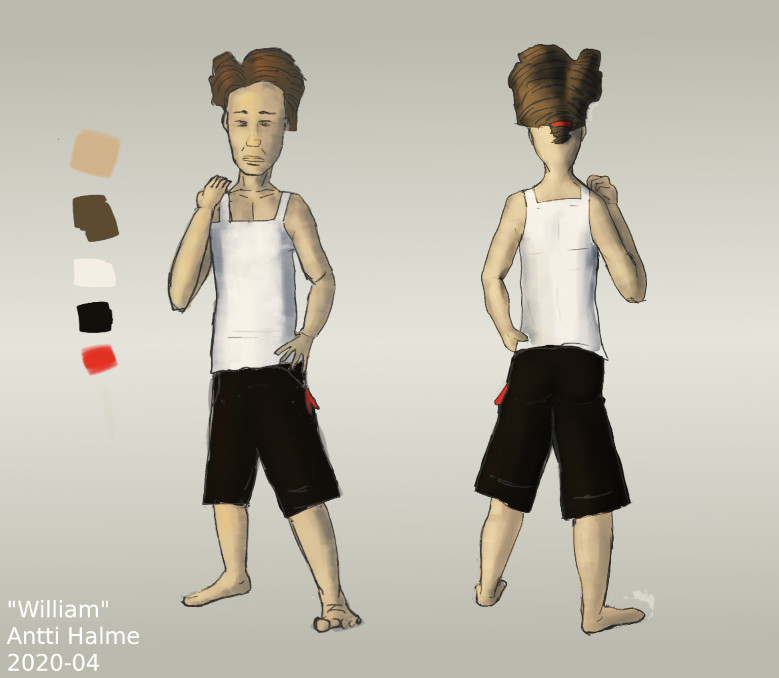
Model Sheet
The Unity character art foundations course emphasises a pipeline mindset, wherein each step along the way adds more detail to the character under development. The character is found through a process of iterative refinement. The overall task is to figure out who the character is. In a team effort this is done in consultation with an art director.
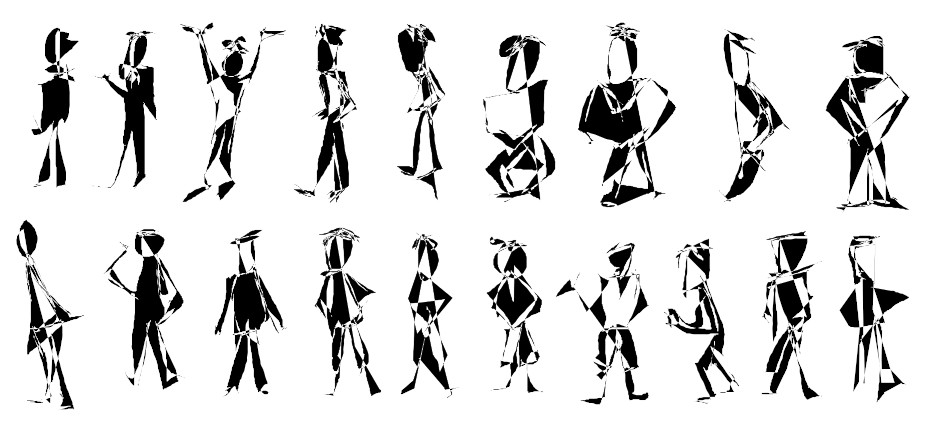
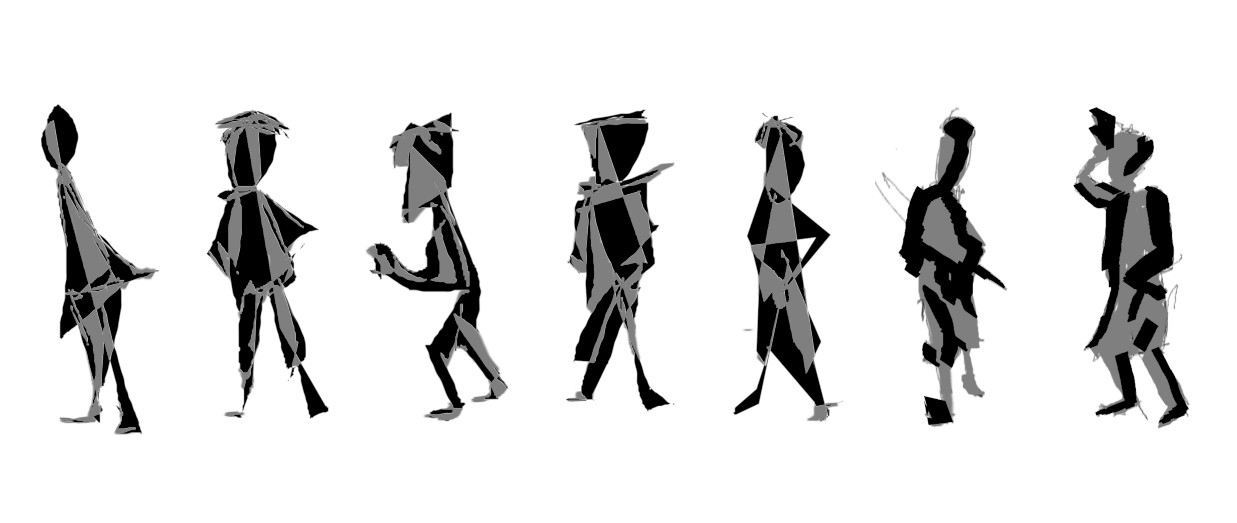
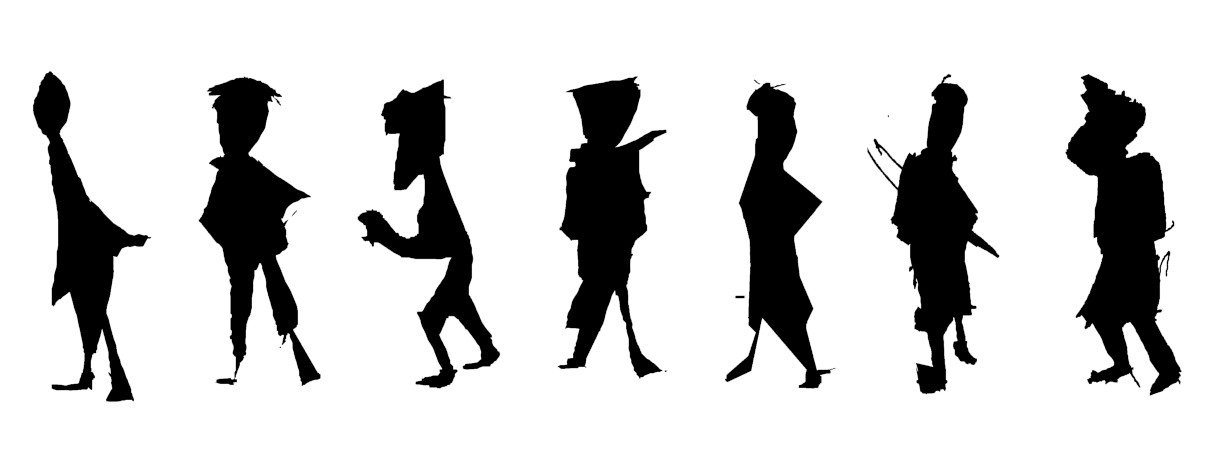
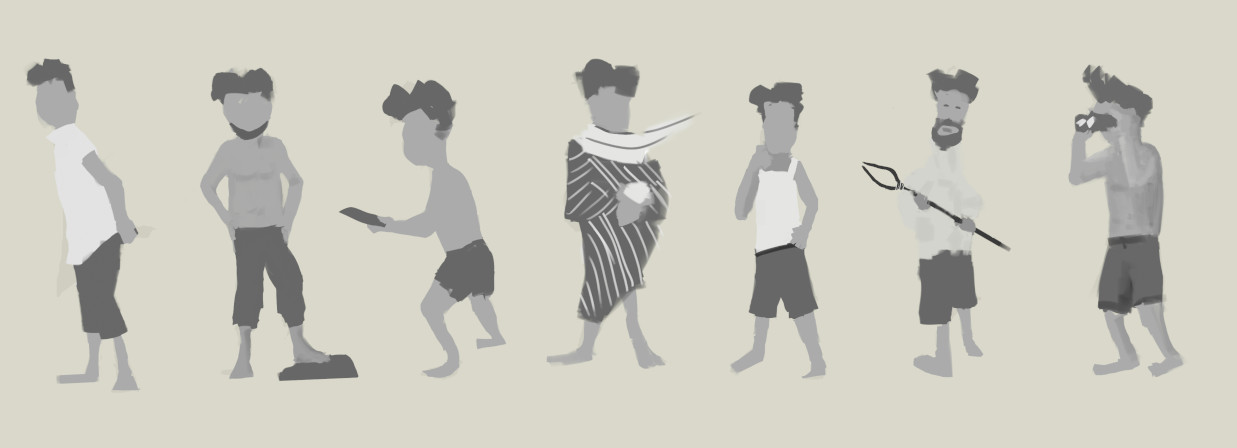
After the character sheet, the next step was trying out some shapes and silhouettes. In this process the emphasis is always on having plenty of material to work with, so that there's always several options available to choose from. In the ideation phase, more is more.
I'm far from a skilled draughtsman, but I can put together an image in perspective, and with considerable effort, maybe in some proportion. Drawing human figures is one of those skills where there simply are no shortcuts: you either put in the effort to learn, or you will never get it right. However, for the task at hand, getting something amazing wasn't necessary, I just wanted something good enough to allow me to move on.
All in all, developing the model sheet for the character was really good fun. The instruction is based on Photoshop, but GIMP proved more than capable for the task. I also jumped to another drawing program, MyPaint, which I happen to have some experience with. A drawing tablet is essential for sketching. My cheap, trusty Wacom has worked fine for me for years and years.
I have used GIMP (and MyPaint) in the past, so there was less tool learning here, but the Photoshop based instruction really crystallised how a whole drawing process can be built around the tool. I looked for the equivalent things in GIMP, and fortunately they were easy to find.
I recommend the proposed path of going from thumbnails to roughs to final rendering to a turnaround. The course has great advice on how to go about each step. Some highlights:
- Layers are the secret to effective digital painting workflows. In my view layers and masking alone make a digital canvas a superior medium to anything analogue.
- Using the lasso tool as a way of generating random volume in a line sketch
- Varying poses to find new perspectives on characters
- Painting by value, a limited palette, as a quick and effective way to nail down a rough shape
- Digital lighting: Shadows and tone live on different planes and combine in the final render — indeed 3D materials are composites in exactly the same way, so this was great...foreshadowing!
Philosophy of Blender
With some kind of a model sheet in hand, I could start building a 3D model. I dived into the Unity Game Dev - Intermediate Art course, skimming prop modelling content, focusing on the character model series. In retrospect, it might have been a good idea to stick to the syllabus and do the treasure chest example first. On the other hand, translating the ZBrush instructions to Blender meant that I had to spend a good amount of time figuring out how to do equivalent things in Blender. I was following the course instructions while at the same time building a bookmark collection of Blender tips and tricks.
Blender is deep. There are many workflows, many ways of doing things. Blender is commonly referred to as a Swiss Army knife for 3D. Unlike the knife, though, Blender's UI is considered by many to be counter-intuitive. The learning curve is rather steep, and I hear especially so for people who have used other 3D tools before. Personally, I didn't find it that bad, possibly because it was all new to me, but I certainly came across a few odd choices here and there.
I think the reason for this friction is that Blender is built by a collective, with many contributors over the years. Blender is organised in Modes (Larry Tesler probably wasn't a fan): you select things in one mode, edit in another, pose and paint and sculpt in others still. At first I found it confusing and really rather incredible that things would be laid out like so, but then I started to think about how Blender came about, and I started to understand what the Blender philosophy was. The organisation made sense in a certain, craft-oriented sense.
Blender is not really a tool, it's more like a workbench. You come to Blender with your project, your idea, and you use whatever tools you have available to you, the tools you have access to and you know about. Over time, people have invented tools to do all kinds of crazy things, and they've shared these tools and ways of doing things. And online, on YouTube and elsewhere, people share how they have used these tools to build ever crazier things. Others then pick that up and run with it, and soon enough there's another tool, another mode.
The Blender UI might be confusing, because there is no one true way of doing things. What you have is an organically grown ecosystem of tools that may or may not play well together. Blender is a thousand different things for a thousand different projects — the common thing is the workbench. Because every project needs a good workbench.
The way to learn Blender is to first know what is possible, then see someone do it, and finally try it yourself. Or skip the first two, if that's your jam.
Blocking and Sculpting
Greatness is in the details, but no amount of detail work will salvage a bad frame. Whatever you are crafting, it will never look right, if you don't get the main structure down properly, no matter how good your details are. Everything sound is built on a base that is then later refined with details.
The canonical absolute beginner Blender tutorial is the Blender Guru doughnut series. It explains the whole shebang much better than I can do in this form. I think I'll just highlight some things I found particularly interesting, as I picked them up.
3D modelling is primarily about building a mesh, a 3D structure comprising points in space and some links between them (aka vertices and edges). The mesh is typically built in one of two ways, either through straight modelling or through sculpting. The former is about modifying the mesh one vertex or edge or a small group of them at a time, while the latter is about shaping the mesh more as a whole, much like a sculptor would work clay.
For sculpting my character, I followed the Game Character Sculpting series. The demonstrations are in ZBrush, but the ideas carry fairly well over to Blender, after some extra homework. In addition to sculpting, I did some parts of the final meshes using the edit tooling — you definitely want to have both styles in your toolkit.
Every time I opened Blender, I learned something new. Incredible feeling.
On top of the mesh, we add layers of colour and texture (image patterns) to give the mesh the appearance of an object in the real world. This is further enhanced by scene lighting choices that gives 3D shapes more of a voluminous look. Modern computers are so fast that many of the surface properties of meshes are determined in terms of their real-world counterparts. "Physically accurate" simulated materials is the name of the game. Instead of describing what something looks like, we say what the thing is supposed to be made out of, and in what kind of an environment it resides. The computer then calculates what this would look like, and that defines what it does indeed look like on the screen.
Blender supports non-destructive editing using the crazy powerful modifier system. The idea is that there are many ways of describing any given mesh and it's not necessary to be explicit about all of the vertices.
For example, you can just say that there are ten evenly spaced vertices in a corner between these two anchors I've specified, and the computer will keep track of all the ones in between. This is known as the subdivision surface modifier, or simply "sub-surf".
With mechanisms like these it's possible to build fine mesh detail on top of a rough frame. The kicker is that you don't have to apply the modifiers — if your computer can keep up, you can just layer stuff on top and never fully "reify" the implied vertices. This is the essence of non-destructive workflows: if two meshes describe the same shape, it's always easier to edit the one with 10 rather than a thousand vertices.
Another essential modifier is the mirror, which allows you to do less than half of the modelling job, by copying your mesh edits across one or more axes. Many things have at least coarse symmetry, so starting with a symmetric base gets you a long way. I say less than half, because you save also the time and effort you would spend on keeping two halves looking similar, if you do decide to change things up later.
On the other end of the modelling spectrum there's sculpting, which is all about having an excess of vertices in the mesh, extra detail that supports the use of digital power tools for moving mesh vertices around in bulk. This enables workflows that are similar to those of a physical matter sculptor.
Sculpting in blender is a way to work at a higher level of abstraction, where you are concerned not with edges and vertex groups, but with what your mesh is supposed to represent. In Blender, the secret to effective sculpting is dynamic topology and the multi-resolution scheme. With these two, you always have the vertex count you need to create new topology, new additions to the mesh, without distorting the existing mesh set. Be sure to pick the far less confusing "Constant Detail" for Dyntopo if you are a beginner.
In summary, keeping things as simple as possible for as long as possible, is key to a good start in 3D modelling. Modifiers help you do this by allowing fast and accurate shape sketching (aka blocking) and by supporting the bulk editing process.
For detailing the meshes, there's a whole suite of sculpting brushes and other tools to help you on your way. Detailing is really just miniaturised bulk editing. Mastering the basics, getting the blocking right, is the way to do it.
There are usually three modes to each brush: additive, subtractive, and the smooth. Smooth is always the same, and available behind the same shortcut with each brush, because it's such a common operation. Additive mode builds up the mesh, by adding or expanding things, while the subtractive mode cuts into the mesh, or brings together. I found myself thinking about sculpting actions in terms of whether the necessary change was more of an additive or a subtractive operation.
As with drawing, having a strong understanding of human anatomy is essential for sculpting humanoid models that "look right". Again, there is no escaping the hours and hours of practice needed to do this well. As always, the struggle is to see correctly and to faithfully replicate structure. Deceiving the eye is hard no matter how you go about it.
For sculpting, many of the concept from IRL scuplting transfer over almost exactly. The only difference is in the tools. Personally, I used a mouse rather than a drawing tablet for my sculpting. Somehow moving around the mesh using the mouse felt more natural to me, but I'm sure I'll give it another go with a tablet in the future. After a while, I found that I had picked up the keyboard chords for selecting brushes and was able to find a flow of sorts. At its best the feedback from sculpting is so immediate that the medium feels responsive in the most vivid sense.
One final thing about sculpting brushes: some of them work much like instruments in the real world would, but some of them are truly digital, and this is really something to wrap your head around. Some sculpting actions mimic real world operations, like applying more clay, or taking the sharp edge of a knife to an object, but some of the actions have no analogue in the analogue world whatsoever. For example, the Layer brush adds volume under the detail level, which makes absolutely no sense. Similarly the Blob brush does an expansion operation that would be effectively impossible with just hands on clay.
And here's the cool thing: your mind doesn't care. With a moderate amount practice, you can be fluent in an operation in a creative medium that has absolutely nothing to do with matter in the physical realm. Take a moment to appreciate how astounding that is. Everyone should learn 3D modelling just to experience that. This is nothing short of gaining a new lens on reality. And yet, I have a feeling most people with 3D modelling skills do not even realise what it means to work in this medium.
Rendering and Retopology
Rendering is the process of generating an image of a scene viewed from a particular point of view. Blender, as the name suggests, supports various rendering workflows and complex processing pipelines.
The essence of rendering is the calculation of how light bounces and behaves among the objects in the scene. Each object, each mesh, is made up of quads or triangles of points, and more triangles means more calculations. If the objects, particularly their surfaces, are detailed and complex, then the calculation takes a long time, as there's simply more to do.
3D models find use in both real-time and non-real-time contexts. In the latter case, where rendering is done only once per frame, for a single shot or for a sequence of frames in a film project, the size of the mesh matters only in proportion to rendering time. In some cases waiting hours or even days for final frame renders is acceptable.
However, for real-time use, such as games, where the model is expected to be controlled by a user, highly detailed meshes are not practical. If the available hardware is not up to the task, delays from real-time rendering lead to unresponsive systems and a bad user experience. This is especially true of mobile systems, where available number crunching power is severely limited. Real-time 3D applications typically require so called "low-poly" or "low-res" models, meshes with drastically fewer triangles.
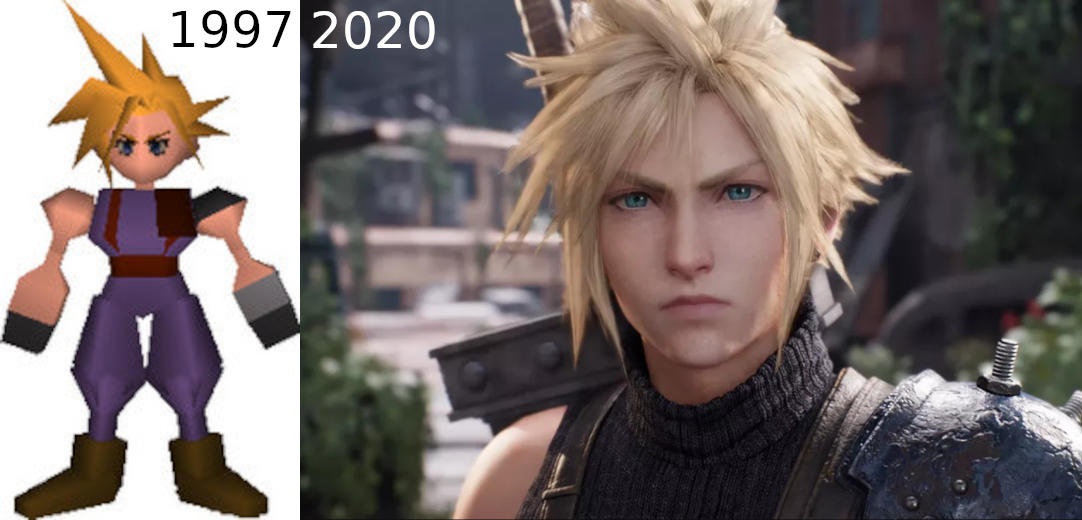
Early 3D games had blocky characters, because that was all that the hardware of the day could render. The PS5 Unreal Engine demo shows what is possible today: a billion source triangles per real-time frame. But even if future hardware can handle complex meshes in a reasonable amount of time, there are other concerns.
For example, detailed meshes take a lot of space. Modern games (2020) pull often tens of gigabytes of content in their updates. And recall how details make mesh deformations weaker: sometimes additional sculpting would be easier on a mesh with fewer features.
But remember that sculpting creates high-density meshes, 3D models with a great amount of detail. So what do we do if we want low-poly meshes? It sure would be a shame to throw out all of the carefully sculpted detail just to make the mesh more blocky.
Enter retopology, "retopo", the art of creating lower triangle count meshes from existing, more detailed meshes. The idea in retopo is to redo the modelling by replicating the shape of the high resolution model in a simpler mesh. The essence of the high-res details can then be added back in later on with some sorcery.
The essential Blender tricks for retopo include the F2 package, various snapping options, and modifiers such as shrink wrap, mirror (again), and displacement. Retopo is a rather artisanal practice, and ripe for automation — people have been trying for years, but auto-retopo is still not quite there.
The objective in retopology should be the creation of "loops", sequences of mesh tiles that join up in a natural way. This makes working with the mesh much easier in later stages. For example, consider the upper arm of a character model: if the mesh faces line up around the arm, it's easy to add another loop next to it, or split the existing one in two, if necessary.
Finally, the secret to keeping most of the detail of the high-poly mesh is baking, a common 3D building term that refers to any kind of calculation done in advance of the rendering. The idea in high/low-poly baking is that we can render the details of the high-poly mesh into a texture or a point map that can then be overlaid on top of the low-poly mesh. I ended up skipping this step, as I wasn't that concerned with surface detail for this project.
Blender Guru explains low/high-poly baking nicely. Grant Abbitt has a great tutorial series on how to create low poly assets with high poly details. See these tutorials for more ideas on how to bake polys in Blender. Unity Learn has whole sections on low/high-poly workflows, geared towards baking in the industry standard mesh texturing program Substance Painter.
UV Mapping and Textures
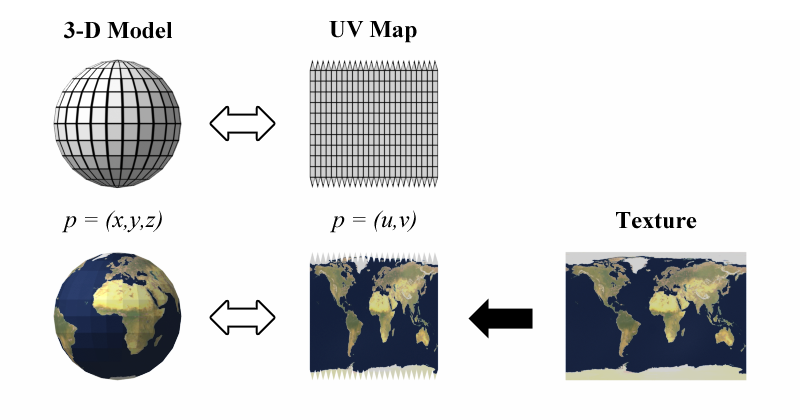
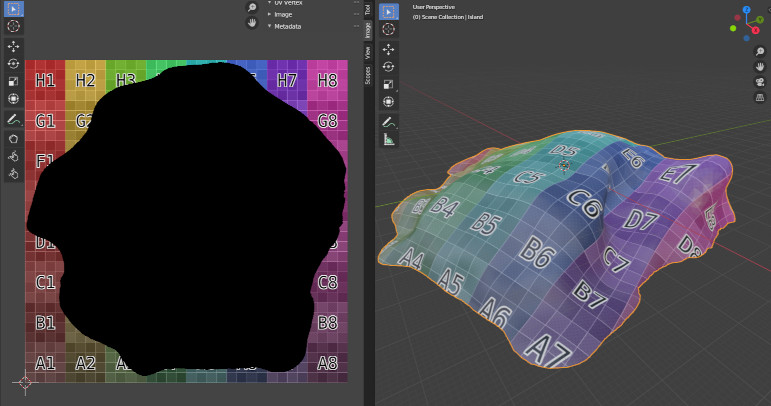
After retopology, I could start building the surface layers of the final model. The first step in this process is the preparation of the model's UV map, the specification of how a 2D surface texture is applied to the 3D mesh.
The U and the V refer to the coordinate axes in the 2D texture space. Canonically, axes x, y, and z refer to the three dimensions of the 3D mesh, while w is the 'fourth dimension' in quaternion based geometry. Hence the U and V variables for this new map.
3D objects generally do not have true planar projections. For example, it is not possible to lay out a 3D globe on a continuous flat 2D surface without distorting or stretching out its internal dimensions. Some skill is required in finding the right balance and compromises between a faithful representation of distances and unseemly stretching on one end, and a "cut up" map that captures more detail on the other. This art of laying out 3D meshes is known as unwrapping.
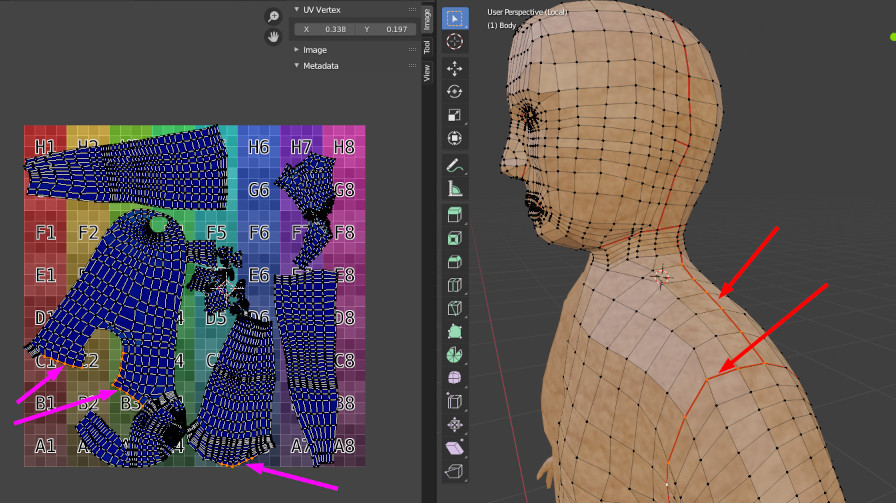
Simple meshes can be unwrapped using the available automated tools, but for more complex meshes, it is often necessary to mark certain vertices in the mesh as seams. These seams, or cuts, designate regions of the mesh where it is acceptable for the mapping function in UV space to make a discontinuous jump to another region in the map.
When a texture is applied to a mesh in the final render, seams in the UV map manifest as texture edges in the model, so seams are best chosen to conform to natural seams in the target object. For example, in texturing a cube, it makes sense to hide texture seams on the edges of the cube, rather than to display the seams right down the middle of the cube's faces.
UV mapping is less of an issue with texture painting, where it is possible to hide seams in paint as needed. With image based textures, seam placement matters more. It is also good practice to line up all the UV mapped mesh fragments, the pieces cut up along the seams. For example, when texturing clothes, if the fragments are well-aligned, fabric sample based textures get applied in a consistent orientation.
Surface Detail
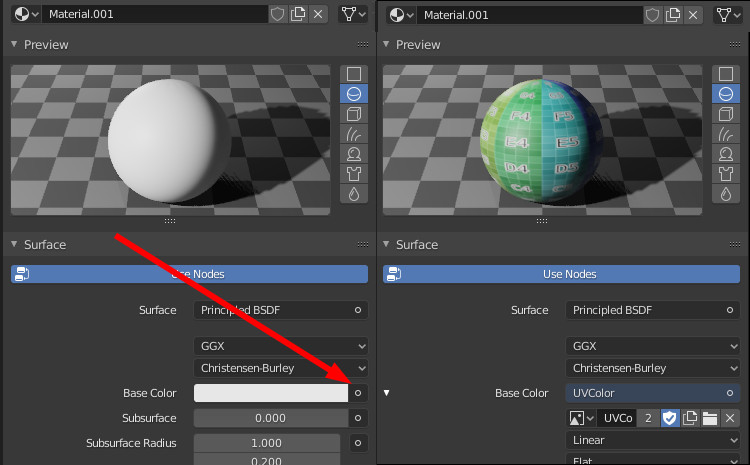
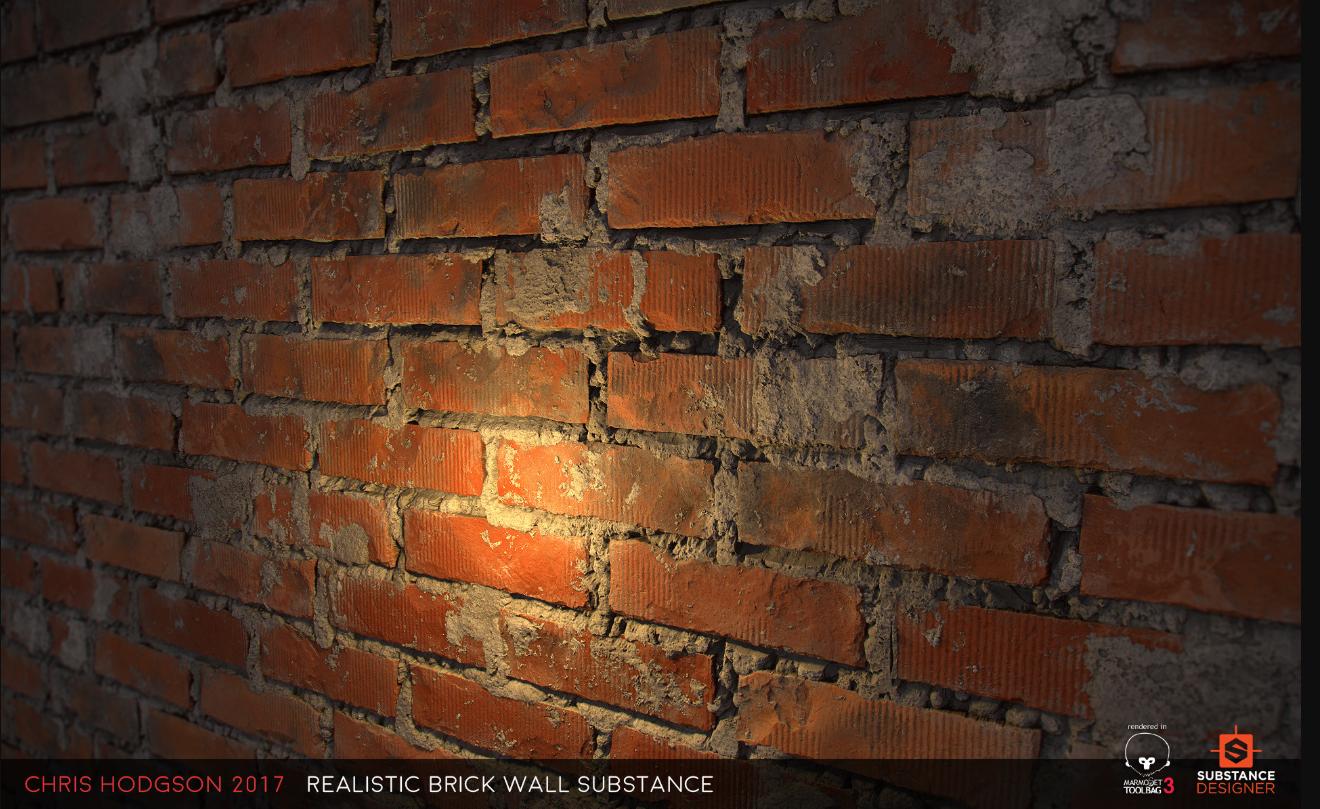
With the UV map set up, the mesh can finally be given a surface to prepare it for rendering. In the olden days this amounted to the application of uniform colour on select regions of the mesh. Once hardware improved enough, we started seeing games that made use of image textures and UV maps for real-time effects. Today we have layers and layers of complex textures for every mesh, helping physically based rendering (PBR) pipelines do real-time lighting calculations to make materials "look right".
Bryan Renno has a fantastic Twitter thread on advances in 3D texturing in games.
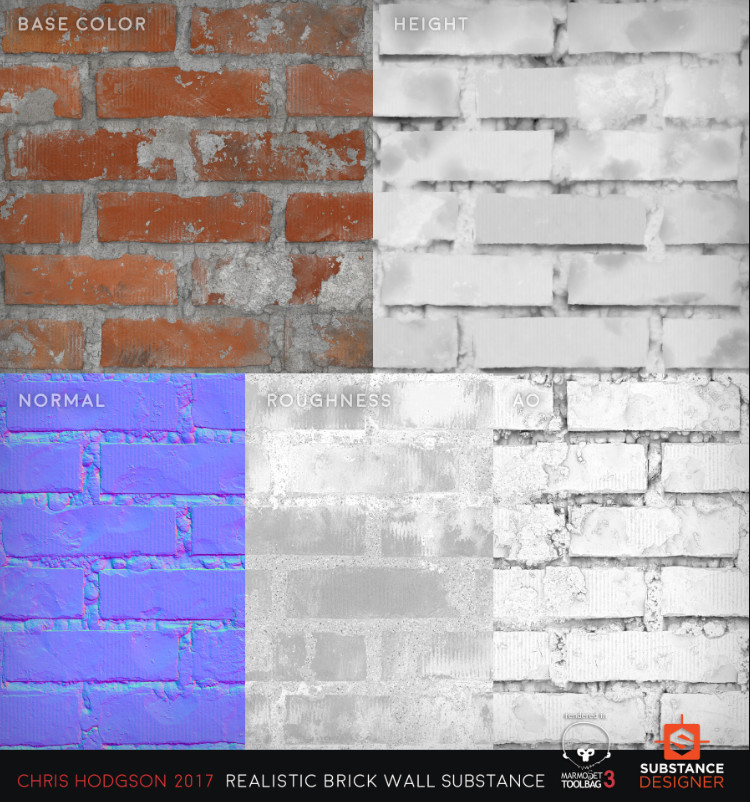
In the brick wall example above, top left is base colour, also known as albedo, or diffuse colour — the flat 'colour' of the material, the sum of absorbed and reflected wavelengths of light. Top right is the height map, which works in tandem with the normal map, bottom left. The height map captures the absolute difference in height between different areas of the surface, while the normal map captures (reflection) angles. Both together help describe where on the plane of the texture there is additional surface detail.
The roughness map, bottom centre in the example, informs physically based rendering pipelines about the 'shininess' of the surface, whether it is highly reflecting like polished metal, or earthen rough. Ambient occlusion, lower right, is a global measure of the degree of 'hiddenness', the extent to which a given region receives or fails to receive ambient light from the environment. In short, ambient occlusion creates richer shadows.
Textures can be created from high-poly meshes by using every available rendering trick to set up a scene, and baking the layer images in a certain way. You'll need a whole bag of Blender tricks to do this. Blender Guru has a video on the crazy Blender workflows for baking texture maps, and Grant Abbitt has good stuff on ambient occlusion.
For this project, I decided to skip making my own textures, instead just slapping on some freely available ones. CC0Textures is a fantastic resource. TextureHaven is another great resource, along with its sister sites, including the HDRI environments repository HDRIHaven. See also Blender Guru's site Poliigon.
Rigging
Texturing the character model completes the Intermediate Art series. For a rendering project, the next steps would be finalising the model, selecting camera angles and lighting options, and tweaking the scene for image capture.
For my project, continuing the Unity Game Dev programme, the next step was preparing the model for animation. The objective was to get the character model to move so that it could eventually be controlled in a game environment.
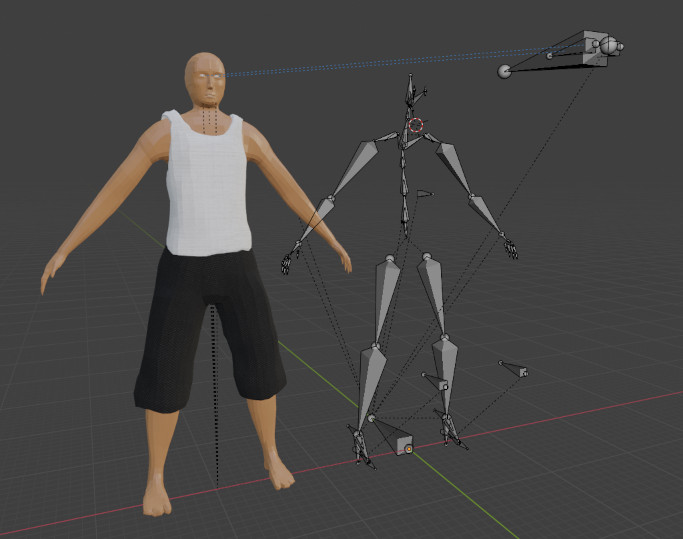
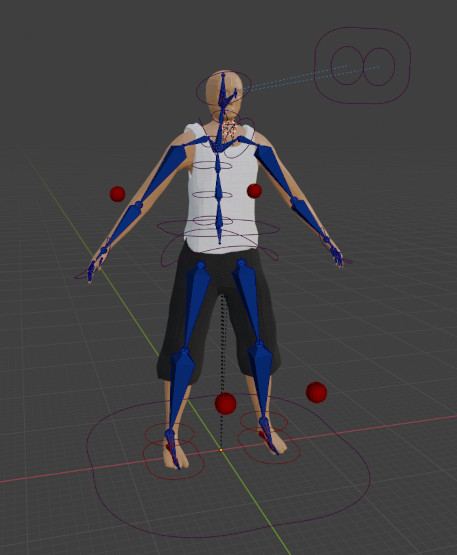
The at times challenging and frequently tedious rigging process is the final step in creating a fully fledged 3D character. The essence of rigging is the configuration of a mesh deforming bone (or joint) structure inside the 3D form. A bone is essentially a directed, oriented link between a pair of points in 3D space.
The idea in rigging is that as the bones move, the mesh around the bones moves in proportion. The analogy is obviously with anatomy, with the caveat that in standard 3D models there are no actuating muscles, so cause and effect are inverted in a sense. Bones determine how the model can be posed. Animation is little more than a sequence of poses and transitions between them.
Rigging forms the main content of the Unity Game Dev: Advanced Art series and indeed is considered to be an advanced topic on 3D modelling. Some professionals in the game industry specialise in rigging. A high quality rig adds a zero to the end of the dollar value of a 3D model — it's that tricky to do well. There are shortcuts, and Blender has some automation tools, but for a highly expressive, detailed character rig (i.e., a textured 3D model, bone structure and animation controls), it's a lot of manual crafting and tuning.
An important part of rigging is the construction of a bone hierarchy, a directed parent-child relationship between individual bones. For example, hand bones attach to the arm and arms to the torso, spine segments link up and connect with the head, and the root of the skeleton is the grand-parent of all the bones in the rig. There's also the ground bone (pseudo-bone), the grand-parent of all bones and controllers, which allows the animator to move the whole assembly as one unit if necessary.
The bone hierarchy establishes a skeleton, a notional bone assembly that captures the degrees of freedom and ranges of motion available to the character model. By default all joints are ball joints, but each bone can be constrained to rotate only along certain axes or only to a certain extent.
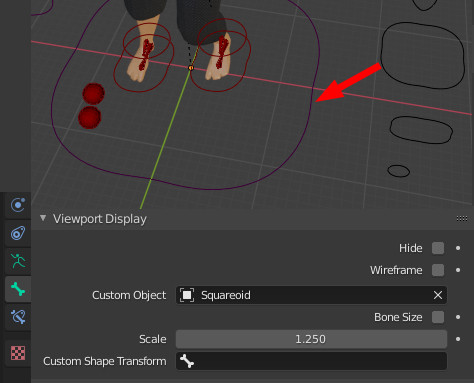
The broader rigging process is concerned with not just the creation of a bone structure to go inside the mesh, but also with the preparation of animation controls, second order mesh deformation handles. Bones deform the mesh, and controls transform the bones. Animation controls, effectively a set of handles that lie outside the closure of the mesh, are easier to grab on to than bones embedded inside the model.
Bones always have two endpoints, even when they are used as a single point reference. Two endpoints means bones have a natural direction, and as a result, the overall skeleton forms a directed graph. The way bone transformations (as a proxy for structural dynamics) are applied and transmitted through the skeleton gives rise to forward kinematics (FK), the phenomenon where moving the parent moves the child as well. For example, rotating the arm moves the vertices of the hand with respect to the same axis of rotation.
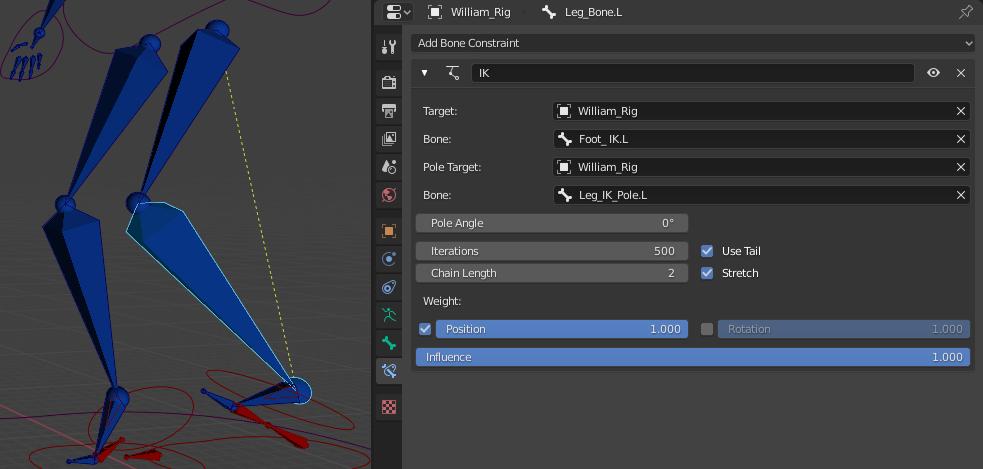
Modern rigging makes heavy use of the inverse concept as well, known as inverse kinematics (IK). In IK the idea is that moving the child can have an effect on the parent. For example, moving an outstretched hand bone back towards the body (by grabbing the hand controller) causes all the bones in the arm to readjust: the elbow slides back, the lower arm bone stays connected to the hand, and the upper arm to the shoulder, albeit in a different orientation. In Blender, this calculation is done automatically along a bone chain, when the IK modifier is set up for the child bone.
Additionally, controls can have scripted behaviours (aka triggers, or drivers), that deform the mesh in a particular way along a parameter dimension. Drivers are a little fiddly to set up in Blender, but the idea is to have a custom parameter in an object, and then a little formula mapped to the target transformation dimension of the target bone.
I also implemented an advanced parameterised rig controller known simply as "foot roll", where the idea is that a single value can be used to drive foot poses in different parts of a walking animation. As the control parameter value changes from minimum to maximum, the foot goes from a toes-on-the-ground pose to a heel-on-the-ground pose, and interpolates cleanly between these extremes. This involves several bones and bone constraints in a carefully coordinated hierarchy. All this complexity is there to make it easier for the animator to control foot deformation.
Check out the complete rigging for animation in Blender tutorial series from Level Pixel Level, featuring best practices for deform bones, FK structure, bone layers and bone groups, curve handles for the viewport, and a fantastic explanation of IK, including IK bone roll. Darrin Lile has the best explanation of a foot roll setup.
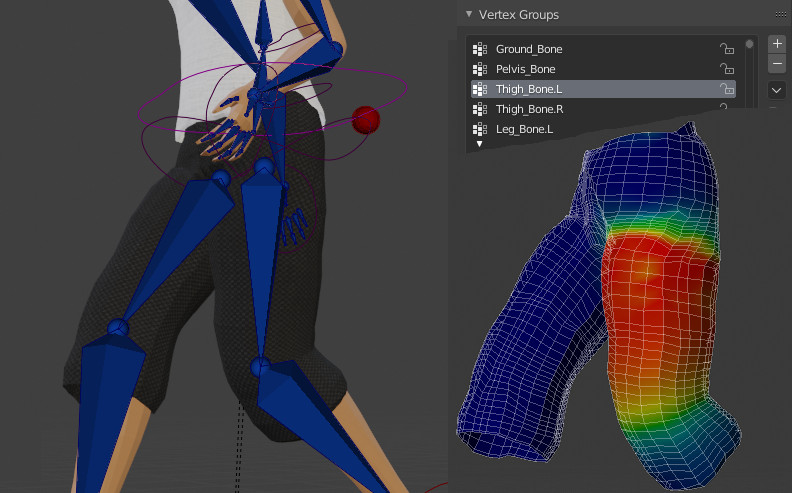
Before we can proceed to animation, there's one more preparation step to take: bone weights. Bones are assigned to meshes in a variation of the hierarchical parenting scheme, much like the skeleton hierarchy bones form by themselves. The idea with bone weights is that each deforming bone controls only a subset of all vertices in the mesh it is bound to. For example, moving a hand bone should have no effect on either foot.
When animating a rigged mesh in Blender, the vertices of the mesh move in proportion to the bones that have been designated as having influence on them. The influence a given bone has on a given vertex is captured in a single value between zero and one, the bone/vertex weight. When binding (or "parenting") the bones of a skeleton to a mesh, Blender offers a number of options, including automatic weights (calculated by distance) and uniformly zero weights (moving bones has no effect on mesh).
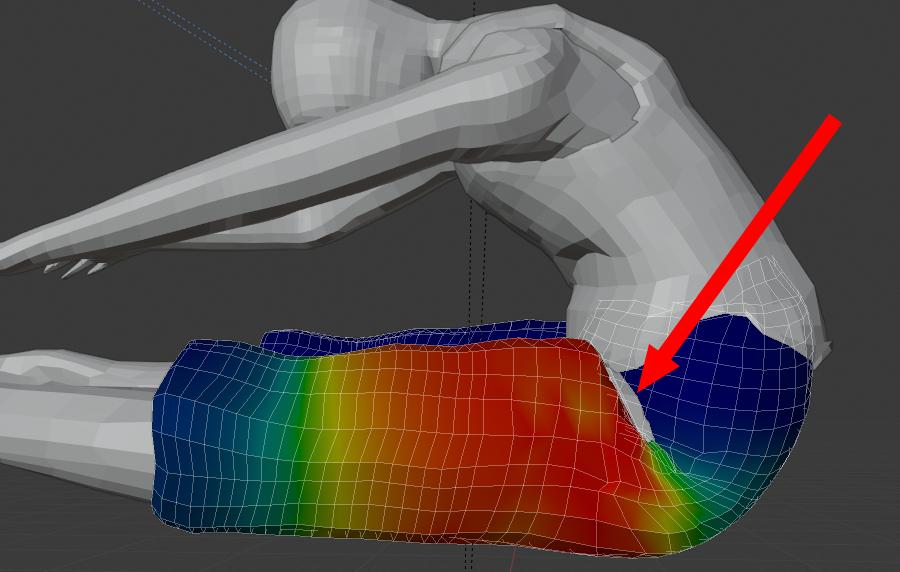
Sometimes automated weights aren't enough. For more complex meshes, or to facilitate extreme deformation, it's necessary to tune automated weights. There are many tools that help with this tuning, but in Blender the principal one is the Weight Paint mode. In WP, the user can set the value for vertices in bulk, by painting weight values on the mesh using a basic set of brushes.
I found a combination of views useful for tuning weights: default A pose is good for broad coverage, but really the details are impossible to get right without deforming the mesh and seeing how the weights "work". Indeed, weight paint mode is available even during animation play, so it's possible to paint weights "live" in a sense.
Animation
Animation, of course, is the art of arranging still images in chronological order and displaying them in a rapid sequence to give the viewer the illusion of motion. In Blender, as in most animation tools, animation is done through a combination of key frames and frame interpolation, where from a set of target poses a whole animation frame sequence is generated.
Animation in Blender is a complex beast, with loads of dedicated views and workflows. Even the default Animation workspace proved extremely challenging to take on — this after maybe two months of using Blender. I think part of the problem was that I was animating bones, rather than objects directly. I barely scratched the surface with what is possible in Blender, and wasn't particularly pleased with the results, but again, I was keen to push on.
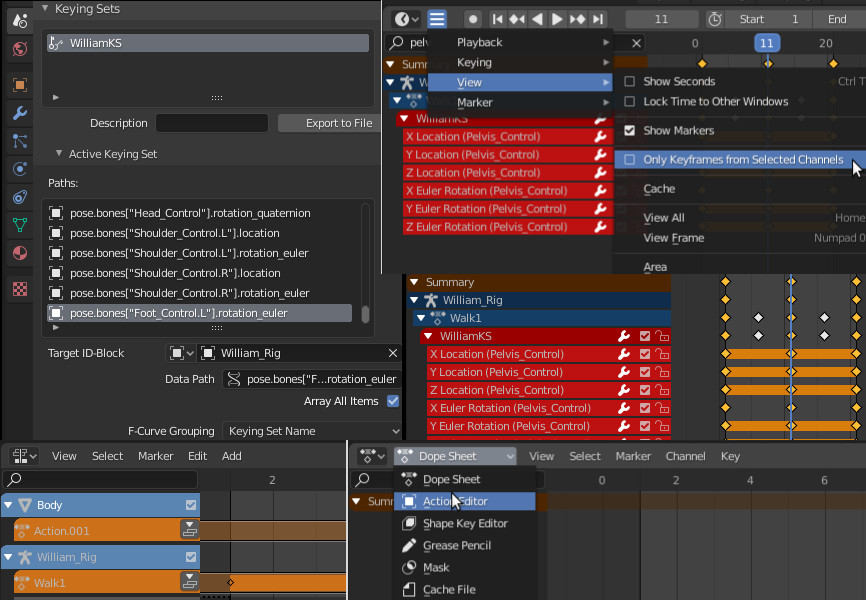
After successfully establishing a a keying set, which I think refers to a set of bone/object transformations to capture, I was eventually able to record a pose on a particular frame on the timeline, and then another pose on a different spot on the timeline, at which point Blender automatically filled in the frames between them by interpolating. From there, it was fairly smooth sailing to complete a single animation.
But then it got tricky again, when I wanted to have a second animation for the same model. I had to figure out how Actions and the Action Editor work. Once there, I was able to sort of figure out how to keep track of two independent animations at the same time. Eventually, I was able to export both animations in one go, in a single .fbx file, as recommended in a number of places online.
Do check out the Unity series on animation for a detailed breakdown of a walk cycle and the idle animation. From there, check out Grant again for ideas on animation in Blender.
Summary
To get this far I had to learn:
- How to prepare for character crafting by compiling a character sheet and a visual reference
- Iterative character sketching, how to explore shapes
- How to create a basic turnaround model sheet
- Blender philosophy: how to find your way around a workbench and a deep, organically grown library of powerful digital tools
- The basics of 3D modelling: from blocking to details
- Blender Edit Mode for vertex level mesh shaping
- Sculpting in Blender, for mesh level transformations
- The fine art of retopology, how to work with 3D assets at multiple levels of detail
- The basics of texturing, including the subtle art of UV mapping
- The basics of modern rendering, the notion of physically based rendering and texture layers
- The engineering that goes into effective model rigging, including the construction of a bone skeleton and animation controls
- Some advanced rigging such as inverse kinematics, bone constraints, drivers, and custom properties
- Basics of animation and Blender's peculiar animation workflows
Months of effort. But with a fully rigged character model and some animations to boot, I could finally export William into Unity and start bringing my character to life!
Building a World
Game engines are strange beasts. The underlying idea is that, at least at an abstract level, many games feature similar elements. On the other hand, no two original games are ever the same, though borrowing ideas is extremely common. The principal content of games can vary significantly. Game engines are platforms that enable game developers to build out their precious and unique ideas using more or less successfully standardised mechanisms and workflows.
Video games typically have computer generated graphics, and the fundamentals of that field do not change from game to game: there's room for sharing approaches and implementations. The same is true for most general things found in games, such as sound, user input, networking, localisation — even AI and programmable game logic. More often than not your game is not exploring new territory along all of these dimensions simultaneously. And even if that happened to be the case, you probably still would want to start off from a known location on the map. Sometimes, of course, you do want to start from scratch, if not for any other purpose than learning.
Game engines, despite being so named, are not just engines of the "vehicles" being assembled, they are the assembly line and the car factory, and all the design tools and all the workflows that go into the manufacturing. You can (in theory) machine all the parts of a car yourself, build your own tools, design and fabricate everything that makes up a car. But more often than not, it's the overall game idea that you really want to explore, not the smallest details of execution and operation. And this is what a game engine gives you: a wealth of resources from which to assemble your game as a bricolage.
Game engines are workbenches, just like I found Blender to be, deep collections of tools that don't always play well together, put nonetheless share a common user interface, the game editor. Game engines also manifest as the concrete suite of libraries that power the final assembled thing. This is the system software that links the content of the game, indeed the play itself, with the resources of the devices that host the experience.
Game engines are as quirky as they are versatile — a veritable creative medium. Game engines are organically grown hodgepodges of functionality, equal parts labours of love and atrocious kludges and hacks. And there's a whole community around each one.
For my island, I wanted to go with something solidly mainstream, so I considered the rumoured market leaders Unreal and Unity. Currently at major version 4 (with v5 to be available in 2021), Unreal is the bee's knees, the #1 choice for major game studios today. Unity is perhaps more beginner friendly and approachable, with more of a hobbyist scene around it. Both are more than capable of supporting any creative idea a beginner could possibly have.
I decided to go with Unity, one major reason being that the scripting system in Unity is C#, a language I'm already fluent in through work stuff. Idea here being that I had at least that experience to bring with me. (Unreal is scripted mostly in C++, I believe.) Something about all the available tutorial content around Unity also made it easy to pick up. Indeed the Unity Learn lockdown offer was the final push for this project.
First Steps in Unity
I run Linux on my home computers, which means that I get to have extra fun when installing software on my machine.
The official guidance seems to be to use the Unity Hub installer from the main site, but I had more luck with the latest builds from the releases thread on the Unity Linux editor forum. What you are looking for is an executable app image file for the hub, which can then install specific version of Unity. The Hub app is a launcher for different projects, and is also used for coordinating thing like the licence (free for hobbyist individuals) and more. It is possible to run different versions of Unity for different projects, as long as each version is installed on your machine.
After jumping through the installation hoops, I was able to fire up Unity and start learning about the editor. I started with the absolute basics, the Getting Started with Unity series, which is an introduction to the Unity editor in the shape of three template game projects. The tone of the tutorials is rather juvenile and playful, but they do pack all the things one needs to get started. There's a great karting mini game (car modelling and control is surprisingly difficult, when you get into it), a first person shooter mock-up, and a 2D platformer to explore. Each one is educational, but the tutorials overlap to a significant extent.
In the tutorials, the emphasis is very much on making the barrier to entry as low as possible. All the code has been hidden away and the focus is on the 3D content and its customisation within certain soft boundaries. A modding-first take on Unity, if you will. The tutorials got the job done, though due to their superficiality, I breezed by them quite quickly. Following my nose and tweaking all the displayed object properties and knobs proved equally educational, if not more so. I had some trouble with crashing on the versions I was experimenting with, but switching to a more recent version helped me there. Linux support is still somewhat experimental, perhaps. The 2019.2 seemed brittle, but I had no issues with 2019.4.
Prelude: Snow Tracks
Moving on from the very basics, the next step would normally be to fire up the fundamentals courses, or perhaps beginner programming. I eventually had a look at both, but I wanted do something a bit more exciting from scratch first. Here, again, I turned to the treasure trove of third party online learning resources.
I came across this fantastic Snow Tracks Shader tutorial from Peer Play, and followed it along to create my own snow driving scene with tessellation powered snow deformation. This was very much a straight-in-the-deep-end dive, with the idea being that instead of messing around with pre-built larger game, I could try to understand in detail something a bit smaller scale. The more difficult path, obviously, but I was thinking that this could pay off nicely. The car model is this extraordinary creation from the Unity Asset store.
The custom shader, written for the old render pipeline (and "by hand", without shader graph), was reasonably straightforward to get going. I had some difficulty with setting up user controls (again, in the old style, without the revamped user input system) and object transforms, until I realised how relative rotations worked. A strong command of 3D geometry is a must for 3D games. Everything in the scene is basic, except for the snow tracks shader, but I was quite happy with how it turned out.
For my overall project, chronologically, I started with Unity and Snow Tracks. After reaching this point, dreaming about an island of sand to walk on, I felt confident that I can build something in Unity. I switched to look at Blender and 3D modelling, not fully expecting it to take about three months from Snow Tracks to get back to Unity again!
On my return, after spending so much time in Blender and its peculiar workflows and hotkeys and things, Unity still definitely felt unfamiliar, but somehow much more approachable as well. As if I had grown used to thinking about 3D space and objects within it. An affinity to 3D, or something — a valuable takeaway for sure.
Understanding Unity
During my absence from Unity, I continued browsing Unity content online, learning about all kinds of cool things to try. I recommend checking out recordings from the sessions at Unite Copenhagen 2019, and general game making content from GDC. Check out r/Unity3D as well.
In figuring out how to do things, I came to realise that Unity (probably like Blender) is in eternal transition. There's always something cool and new and revolutionary just coming up. And just as the future arrives, the goal posts shift, key people move on to other things, and you yourself have adapted and changed. This is why it's important to stay up to speed on the tools. The workbench itself evolves, the tools come and go — nothing is ever really stable. Creative tools are never complete. Embracing the chaos is the right mindset, the path to effective use of this medium.
The lesson is simple: do your project now with what you have access to. Nothing about the future is certain. This is extra true of the person you bring to the task. Making stuff is an end in itself. Build what you can and pick up skills along the way. Choose your milestones carefully and be flexible and happy with the things you bring in the world.
Sometimes, however, things move so radically that one must be mindful about how the world is changing. Unity is slowly moving to DOTS, data-oriented technology stack, which amounts to a huge reshuffling of the whole platform — it's a workbench upgrade effectively. Many tools and workflows may be affected. Here's a little something on using DOTS in projects. To me, DOTS seems like a step along the entity-component line of thinking, as manifest in AAA games like Overwatch. In other words, Unity is evolving to meet the needs of high-end games of today.
Another transition underway is that of the move towards scriptable render pipelines. There's the universal render pipeline (URP), offering a performance and capability boost for all devices, and the High Definition Render Pipeline (HDRP) for high-fidelity graphics and high-end devices. Here's the ever-enthusiastic Brackeys with a comparison of URP and HDRP.
This move from a single standard render pipeline for all your 2D and 3D games to two separate ones is an interesting one, as dividing the workbench in two may not go down well with the Unity community. It's the most dangerous kind of fragmentation and the worst kind of breaking change all at once.
Things change fast in Unity land. This is very much a live medium.
Exporting, Importing
So I took a few months to learn enough Blender to create a character, but eventually I returned to Unity with a great urge to see my project through to some kind of a milestone. I wanted to get my character into Unity, get a basic island going, and have my guy walk around it. That would be my proof of concept.
Late towards my Blender character exercise, I started to look at exporting options and found out that there's (at least) two main ways of doing things. First of all Unity is capable of auto-importing models from a .blend file, the default blender project file. This worked great for initial import experiments, but ultimately I decided against it, as I had some issues with the animations. The second way is to export standard .fbx files from Blender and import those as new assets in the Unity project.
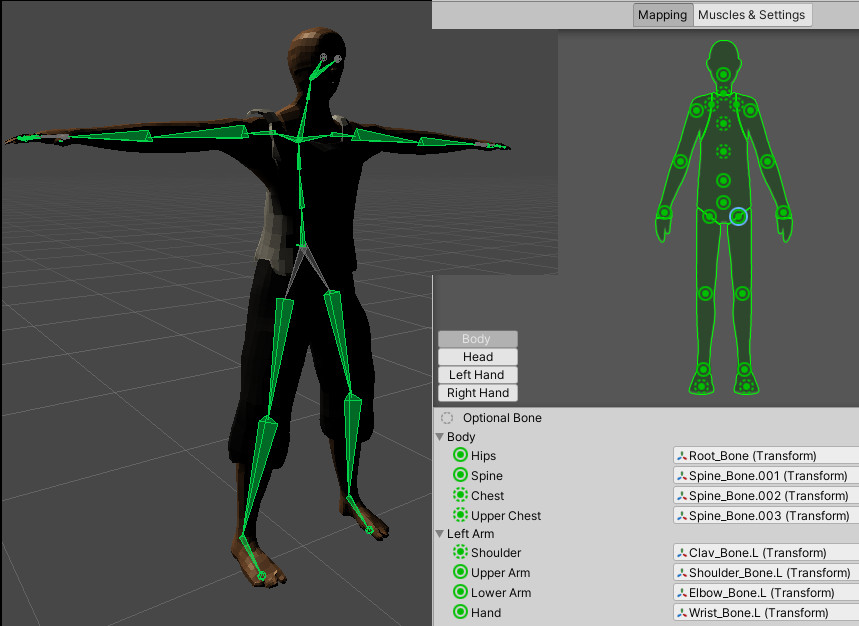
Turns out there's quite a bit of fudging involved in bringing in assets. The reason is that the engine has to make certain assumptions about 3D models, particularly character models, so that all the engine provided capabilities work as intended. There is a mapping between the mesh and the bones of the model, and the "humanoid" character template that the engine provides. Similarly animation is not really baked in to the mesh, but rather recorded in the bones, and this information has to carry over into the engine.
And, of course, there are subtle incompatibilities. For example, for some mesh imports, Blender and Unity can't agree on the coordinate system, and things may end up tilted by 90 degree along some axis. Similarly, my character rig in Blender ended up having more and different bones than what Unity expected, so there were a few things to sort out.
Overall, though, Blender and Unity do seem to work pretty well together. There's definitely something to learn about the import process and how Unity prefers things, as these can then influence choices in Blender. For example, one should probably work from the start with a skeleton that matches Unity's expectations.
After getting the gist of model importing, I had grand plans about making all kinds of assets for my scene, but none of that seemed that essential for what I was going for. For now, at least, I settled on what I could find on the Asset Store. Raiding the Asset Store is pretty much the digital equivalent of kitbashing, which is practically an essential part of all modelling media. When telling a story, the right prop can make all the difference, but sometimes a palm tree is just a palm tree.
Textures, Shaders, and VFX
I decided to give the new render pipeline, URP, a chance. Having started a "regular" projects, this meant that I had to re-import and reset all the materials I had pulled into the scene. Unity makes it reasonably straightforward to translate a standard render project into URP, with a set of instructions to boot. The all-pink broken world was a little worrisome, but fortunately all the materials found their look eventually.
For my character, William, The lowish poly character mesh and clothing is covered by simple textures, as I didn't want to fuss over the look too much. A cotton texture for the top and a sack texture for the cargo shorts. An overstretched skin texture adds a little something beyond flat colour. Even played around with some textures for the inside of the mouth, but I cut close-ups and talking animations from this project.
In addition to the relatively straightforward textures in PBR materials, there's a whole different way of defining how the surface of an 3D object looks to the camera. Shading is the process of calculating the light data for 3D objects for the purpose of rendering, but in modern parlance shaders refers to a wild category of small graphics effect programs that go well beyond basic lighting calculations. Recent versions of Unity support Shader Graph, a node based tool for creating composite shaders, complete with a library of node primitives to use in assembling a full shader. Here's a quick rundown of all the shader nodes.
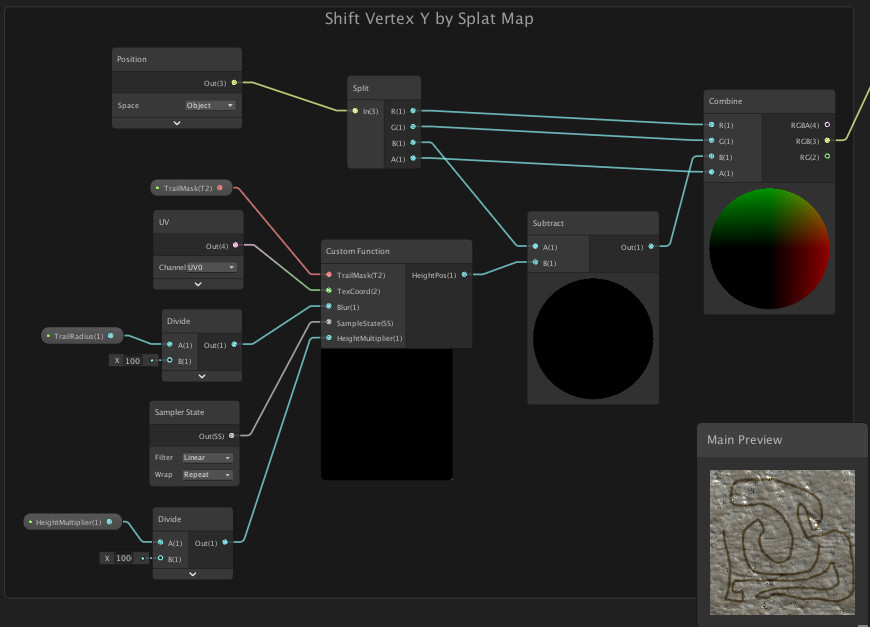
I didn't invest in character textures, but I did want to try and do one proper texturing job using the shader graph. I put together a sand material that had all the maps for bumps and more interesting light behaviour, and then tried my hand at making a sand impression shader following another snow tracks tutorial. I couldn't get it quite right, so that ended up getting cut as well. Still, having done snow tracks twice, I think I have a pretty good idea of how to do it.
Essentially, the idea is to use a render texture as a trail mask and lerp that together with the main sand textures (or any other material). By applying the trail mask as a vertex displacement channel as well, it's possible to deform the target mesh in lockstep with the texture. For the island, the tracks implementation was based on shader graph and URP PBR, which currently do not support tessellation, so the fidelity of the underlying mesh plays a significant role in how the effect looks. The final piece of the puzzle is to wire the mask to the controls and animation, such that when the character's foot lands on the ground, then at that point a brush paints on the mask that drives the effect.
In addition to the sand, I wanted try a water shader as well. I came across a great tutorial by Daniel Ilett on stylised water in the spirit of The Legend of Zelda: The Wind Waker and knew I had to give it a go. At this stage, I could not be bothered with the stylised look clashing with the more "realistic" surfaces. The point was to see what is possible.
My re-implementation of the stylised water shader is almost exactly as in the tutorial, except that I replaced the unlit master node with a PBR master so that it could receive shadows as well. I also struggled to get the shader to show up correctly in the game view, though it looked great in the scene view. The fix was to move it later in the render queue, with a value of 3000. (I'm not entirely sure what that means.)
The gist of this water effect is to distort a flow map as a function of time, and then combine that with both a light and a dark Voronoi pattern (or texture) for the look. Combine vertex position with a time signal and pass it through a sinusoid for the vertex displacement. Then mark out where the target mesh is clipped by other things, and add a buffer of foam there. Wire everything up into a PBR master and tweak knobs for desired effect.
At this point, I was completely hooked on Shader Graph and playing with shaders. This is apparently quite common, to just get lost playing around with materials and special effects. It is extremely satisfying to get out something that looks the way you like — or indeed better, if you stumble upon something neat by chance. However, for this project, this excitement meant that it was time to move on.
Next step would probably be to add some motion. The vertex displacement gives only a low frequency ocean wave effect and a fairly nice object collision effect. For more elaborate splashing, there's more stylised tricks such as these effects. Simon Trümpler's talk on stylised VFX is a must.
Scripting
I filled up my world with stuff, but it was still far from alive. It was time to make things happen.
Everything programmatic in Unity is done with C# scripts, short programs that are roughly either instances in collections that get updated at regular game engine intervals, or standalone objects (in the programming sense) that a driven by events. For example, objects in the environment can have special scripted behaviour that is realised at each point in the game loop, the pace with which the engine coordinates the events of the game. On the other hand, some things — many things — are triggered or altered by events raised by user input, such as move commands.
From my extensive online tutorial dives, I've come to the conclusion that most game developers are not particularly good programmers. As with graphics and everything else, people just do the minimum thing to get something to look right. The trouble is that in software, this path quickly leads to trouble as complexity grows, as simple game logic level bugs tend to proliferate. Everything leaks, but the overall product keeps on trucking.
Unity seems to protect game developers from themselves by way of providing certain abstractions and endorsing certain program flows over others. This is probably true of other engines as well. Unity scripting is all about doing little things in many places, and trusting the platform to do the overall orchestration. Objects in the scene are the units of computation, which makes service oriented approaches challenging. Non-objects things, from UIs to data stores to post-processing, are effectively just thrown on the scene as invisible objects.
Namespacing, interfaces, dependency injection, data ownership and access patterns — these kinds of things I think are the key to versatile software systems. None of these are explicitly endorsed by the Unity model, but they are certainly not banned either. For example, the object/component model leads to a tale of two scopes: the object local one, and the global namespace. Maybe that's enough for the endorsed patterns, but I suspect building a modular system on that foundation might prove challenging.
In any case, being a somewhat seasoned C# dev, jumping in to do Unity scripting was easy peasy. Still, I did encounter powerful newish ideas in Unity (as in fellow workbench Blender), particularly when it comes to extending the editor through code — i.e., tool-making. As a Unity novice, my understanding of what Unity can do is of course limited, but I do see the event and game loop orientation to be natural for games and a great starting point. The life cycle system is powerful, versatile stuff. While I'm not sold on Unity as a development environment for complex systems, it's clear that Unity can serve as a host for complex behaviour. And maybe that's the way things should be.
In the end my scene was effectively just a camera and a light, my character, and the objects in the environment. I also set up some basic colliders, but that's pretty much it. For this simple project, the majority of the scripting I put in was related to the inputs and the camera.
Inputs and Controls
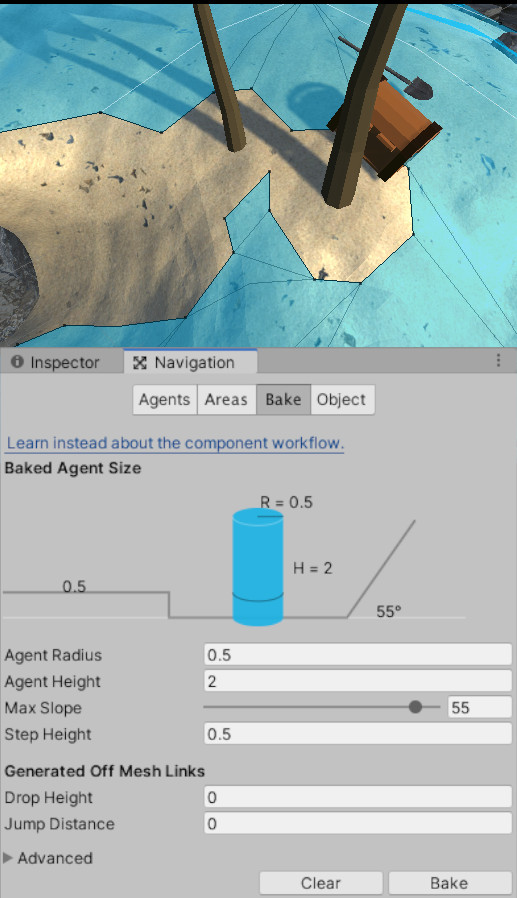
User input and navigation are great examples of ways in which a game engine can make life easier for a game developer. For my island, I wanted to have keyboard controls for movement and mouse control for the camera. I also made use of Unity's standard navigation mesh system) (NavMesh) for coordinating character movement. This Unity Learn series is a great, short introduction to navigation and controlling motion.
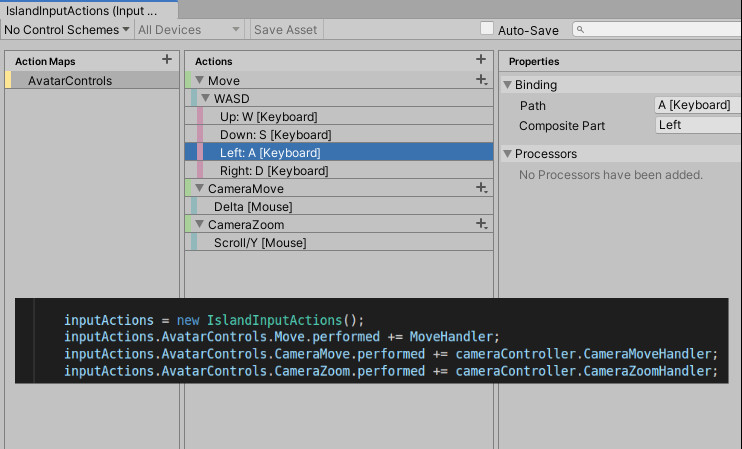
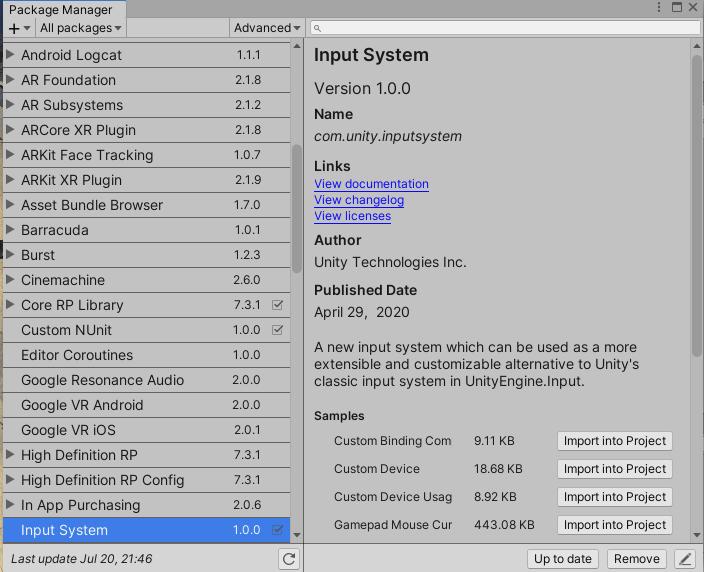
Unity has a brand new Input System that allows developers to map user inputs to actions in a centralised way. These actions are then surfaced as events that can be subscribed to in object scripts. For my simple thing, it worked really well. I'm led to believe the system is capable of all kinds of complex control schemes and supports a diverse range input devices. The whole system looks to be just an elaborate code generator with a GUI — a really nice, well-behaved way to create tools on the Unity workbench. Deployed cleanly as a package, through the package manager.
With the NavMesh system, navigation is a matter of target position designation. When user input is received by the centralised listener, the scripts that listen to the corresponding events can execute whatever routines they see fit. For the main character object in the scene, this means that a transformation is calculated based on the input, and the new position is sent to the character's navigation agent. This then moves the character in the scene.
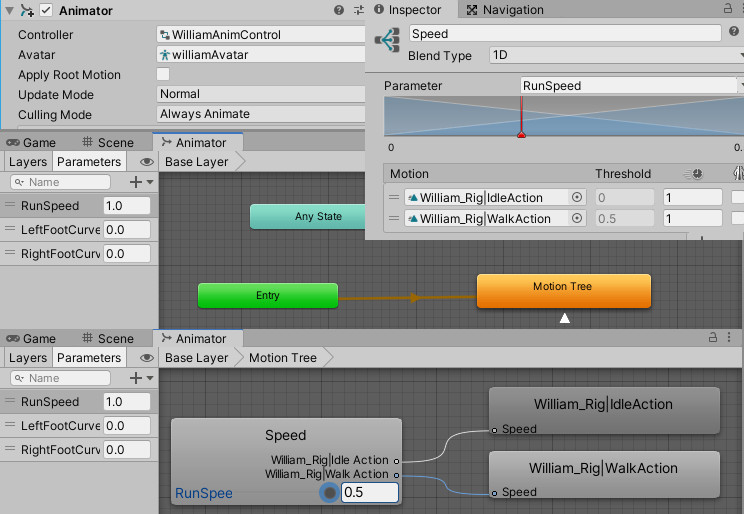
Once the NavMesh agent has been instructed to move, the character mesh needs to be deformed according to the moving animations. Unity, again, has a great subsystem just for controlling animation for character movement. Moving around is, after all, a fundamental game mechanic.
Animation control is based on mapping the navigation agent velocity to a forward motion parameter on the animation controller in charge of character animation. The character object has an Animator, which is linked to the animation controller. The controller blends available animations based on a the motion parameter ("Speed"), as determined by the animation state machine ("blend tree") described by the controller.
For example, if the character is moving at full speed towards the navigation target, the Walk animation is used. As the navigation target is reached, the navigation velocity goes down and the animation blender switches to the Idle animation. This is all managed by the engine, including the smoothing out of all animation transitions. There's a wealth of tuning parameters available as well.
For a final flourish, I wanted to wire up the Inverse Kinematics system. My approach follows this talk on foot IK, which isn't pedagogically too great, and I have some doubts about the code, but it does show the effect I was interested in. I implemented something similar, but with a completely different structure.
The way foot IK here works is that a virtual ray is cast towards the ground through both feet. The point where the ray intersects with the navigation mesh layer is captured, and the position of the foot bone is moved towards it. The effect is that the character's feet are adjusted to the contours of the ground. The pelvis is also rotated accordingly, to accommodate shifts in pose. For final polish, turn the ball of the foot towards the normal of the surface, when the foot is on the ground, as described by the animation curves.
Note that for this to work at all, animation layers need to have the IK Pass property checked, or the engine won't know to call the necessary virtual functions.
There's loads more to get into with dynamic animation and motion. Procedural pose animation is the future. This amazing talk by David Rosen is a must-see for the fundamentals of procedural animation. There's new animation workflows coming to Unity as well.
Camera
The game camera is a fascinating subject. On one hand it's all about (virtual) optics and how light and objects play together, much like all the rendering concerns in Blender. On the other hand, the camera is an integral part of gameplay, and therefore subject to constraints and desires imposed by the user.
Brilliant adventure game Journey apparently had a particularly insightful team behind it. There's a whole range of entertaining and insightful talks online from people involved in that project. John Nesky's GDC talk 50 Game Camera Mistakes is a fantastic take on what makes game camera systems work in general, and the effort they put in the game camera for Journey in particular.
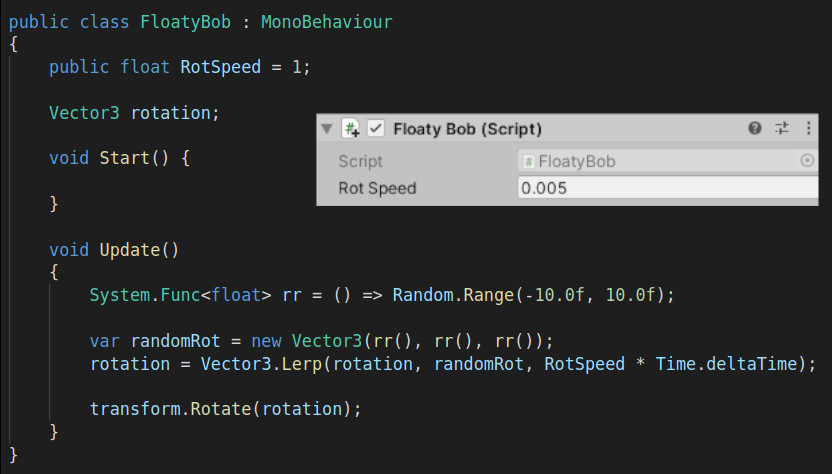
Again, I didn't invest too much on camera mechanics, but enough to see what a huge difference a little effort here makes. Squirrel Eiserloh gives another quick take on what to avoid and do with cameras in his GDC talk Juicing your cameras. Finally, I was inspired by this gentle and unique take on the YouTube instructional to create a simple rotation for my camera.
Summary
To get this far I had to learn:
- How to get Unity up and running on my Linux box
- How the editor works, the workbench metaphor, malleability of the Unity UI
- Unity editor basics: main panels, object transformations, component parameterisation, world objects
- Basics of tessellation shaders and vertex displacement, layered textures, and texture blending
- How to flip my project to use the Universe Render Pipeline; more generally about scriptable render pipelines
- Mesh importing intricacies and humanoid character bone mapping, re-targeting; animation import
- Working with the Asset Store
- Mechanics of the Shader Graph and shader materials; render materials
- Basics of shader based visual effects in a scene
- Unity's object oriented scripting approach to system programming; behaviours, update loops, and the object life cycle
- The input system
- Basics of the navigation mesh construct
- The animation controller system and object animation control through the animation state machine; animation blending
- How to implement Foot IK at the code level
- How to operate the game camera; smooth camera controls
It was long journey to get here. I had to scale back my ideas and ambitions every step of the way, but I'm really happy with how far I got. You know how the line goes: This is certainly not the end of my 3D journey, not even the beginning of the end. But, perhaps, this is the end of the beginning.
And now I have an island to walk on.
Retrospective
Free tools to try,
Free training online;
Free weekends in isolation,
Free your mind in virtual creation.
Great tools rewire the brain. Mastery over tools and techniques makes the artist and the artisan, but even dabbling in creative pursuits is highly worthwhile. Having access to these virtual authoring tools and and to all the inspiration and guidance online — it's a wonderful thing. With this exciting medium of the 3D, with this infinite canvas, not even the sky is the limit.
Everything is made up of small details in a larger structure. The overall feel of it is key, though the details matter as well. It's all about iteration and refinement, experimentation and gut feeling. There's technique and technology and talent and taste — a process and a practice. Try again, and never stop learning.
To wrap up this project, a brief look back and perhaps forwards as well.
In the beginning, as my primary goals, I wanted to:
- Learn the tools and techniques of building a digital world, and
- Get a better feel for what it takes to realise ideas in 3D. For example, I wondered what it would take to build a simple environment for AI experiments, such as those seen in OpenAI's hide-and-seek project.
As my secondary goals — as themes — I wanted to explore:
- The idea of building things incrementally from fundamental, available things. This feels like a current trend, with examples as diverse as the game mechanics of Minecraft (a veritable 3D authoring system), the YouTube series Primitive Technologies, and the absurd, award-winning shōnen serial Dr Stone.
- The idea of a more reflective, emotive digital experience, inspired by all kinds of "walking simulators" and games like Journey and Lucas Pope's Papers, Please.
- The idea of isolation, being stranded on an island, inspired by the etymology of the word, the lockdown context, and scenes with Wilson in Castaway.
In other words, I went in looking to develop technical skills, but thinking about more contemplative digital content. Ultimately, I focused on the tools and techniques, but the creative side of the enterprise was still front and centre in my mind. Except for when I was playing with material shaders, which, it turns out, can be endlessly entertaining.
Long story short, there is next to no gameplay in my final thing. There is no game to play.
What I do have is the knowledge that I can now build whatever I can imagine. There's a difference between authoring and creation, and I think my main lesson here has been that these truly are tools for creation. Those who can wield these tools, who can bring their ideas alive at the workbench, are deities in their own digital universes.
There are many things I want to look at next: procedural generation, motion capture and photogrammetry, more shaders and special effects, proper animation, Unreal and Substance Painter, etc. It would probably be best to work a little project into something more like a finished state. Or maybe not. Maybe learning how to do things is plenty.
All I know is that building things in 3D has already been an unforgettable experience. Every journey begins with the first steps, and I'm extremely happy to have started on this one. I learned a lot, and I'm glad I had the patience to write down at least some of it in this piece. I hope you, dear reader, are inspired to give these things a try, if you haven't already.
Reflections
"Blender is part of the ecosystem of the Internet — and the kids like it!"
"[...] Blender is this incredible tool, but because it's a technical tool it's very easy to confuse the craft with the technology. [...] Blender is a legit art medium. It's the most versatile art medium I've ever encountered."
"I kind of feel like there should be a Hippocratic Oath for game animation: at first you do no harm to the gameplay."
"[...] It's like we are trying to capture realism, but we're trying to capture the realism that we wished."
"[...] 3D Rendering and Visualisation is expecting to see 25% annual growth per year until 2025."
"My sort of fantasy image of movies was created in the Museum of Modern Art, when I looked at Stroheim and D.W. Griffith and Eisenstein. I was starstruck by these fantastic movies. I was never starstruck in the sense of saying, 'Gee, I'm going to go to Hollywood and make $5,000 a week and live in a great place and have a sports car'. I really was in love with movies. I used to see everything at the RKO in Loew's circuit, but I remember thinking at the time that I didn't know anything about movies, but I'd seen so many movies that were bad, I thought, 'Even though I don't know anything, I can't believe I can't make a movie at least as good as this'. And that's why I started, why I tried."
"Ah, fire hydrant, I failed to capture your essence."
